WhatsApp Catalog Ordering
With Nextel, you can create a complete online store using Facebook Catalog to let your customers make orders directly from their personal WhatsApp.
Benefits to take orders from WhatsApp
- Not required to valid buyer contact number
- Simple, standard interface and experience for the buyer
Limitations of Catalog Ordering
- You can only send 30 items from the catalog in a message, so in case where you have 30+ items then you need to use List or Quick reply button to ask for the Category / Sub-category before sharing the items
- No option to change menu items based on user location availability
- WhatsApp Business API currently not allow WhatsApp Payment, so you will need 3rd party payment gateway to collect order payment on WhatsApp
Steps to Create Ordering Flow
Step 1. Creating a catalog on Facebook Business Manager
Step 2. Connecting Catalog with WhatsApp API number
Step 3. Adding your catalog in Nextel dashboard
Before you begin on the below steps, make sure to add Address, Email on your WhatsApp API number profile.
Creating a Catalog on Facebook Business Manager
Step 1. Go to Business Settings of you Facebook Business Manager, expand the Data Source tab, click on Catalog > Add > Create a new Catalog
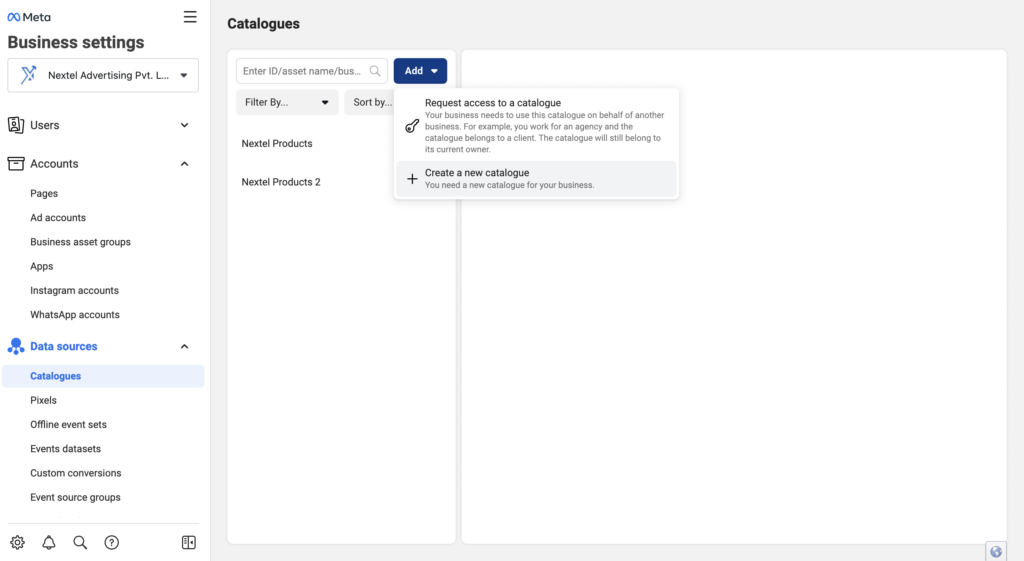
Step 2. Go to Business Settings of you Facebook Business Manager, expand the Data Source tab, click on Catalog > Add > Create a new Catalog

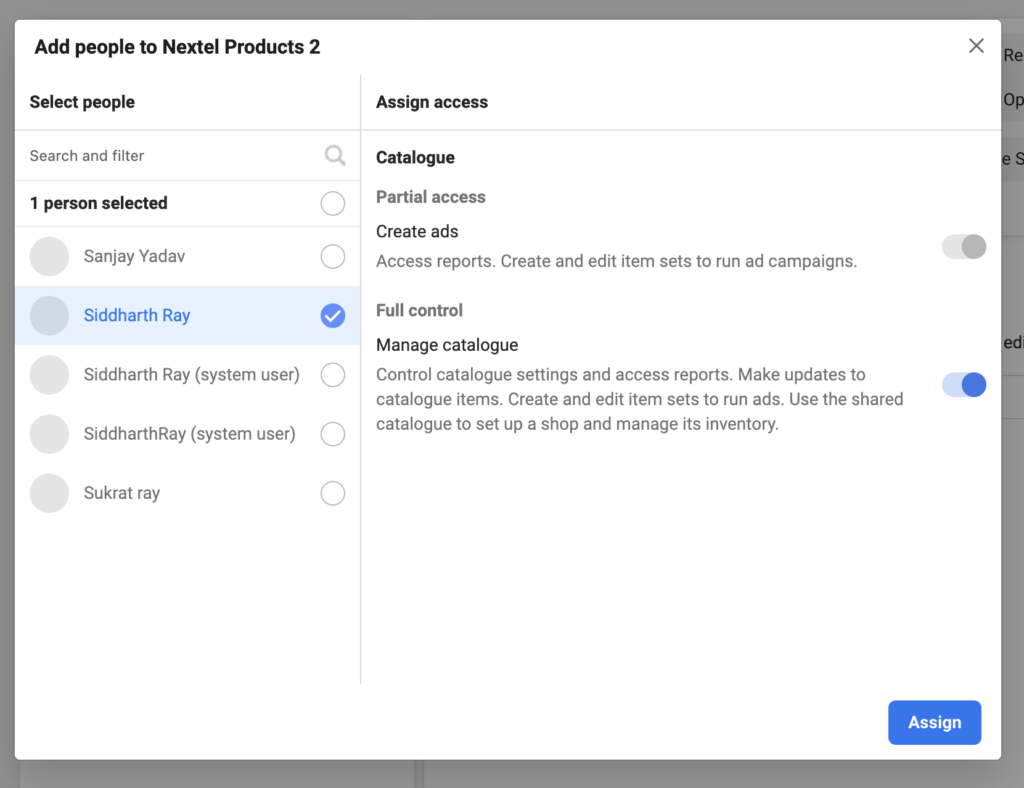
Step 3. After creating, Assign access to yourself with Full Control to manage catalog permission
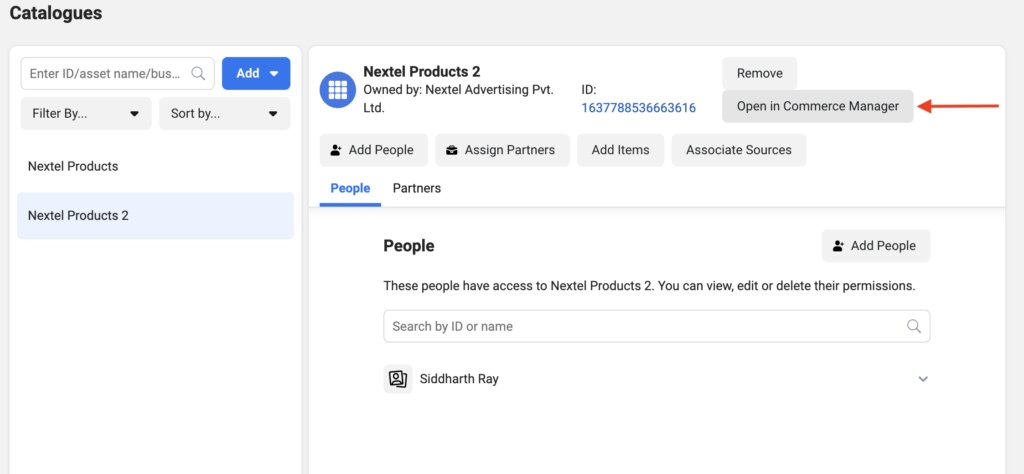
Step 4. Click on Open in Commerce Manager
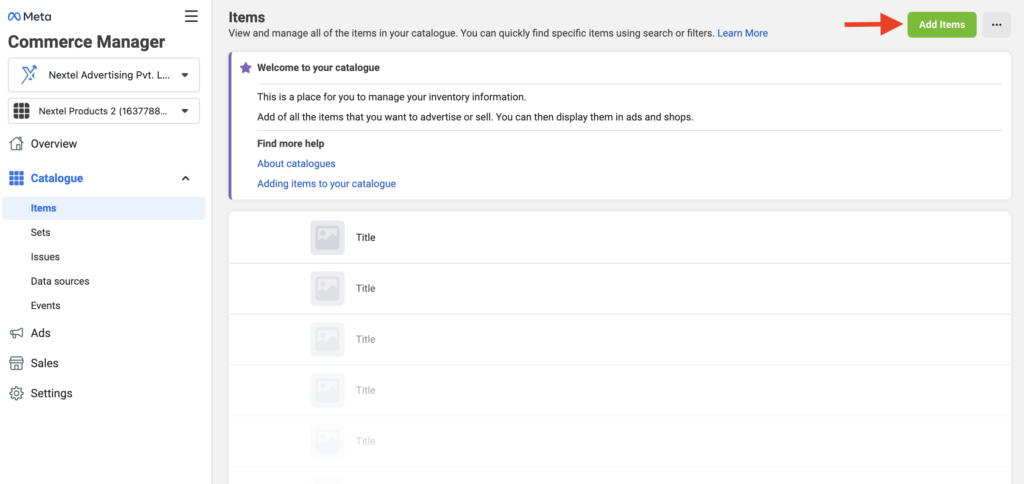
Step 5. Select Items from the left hand menu and Click on Add Items button on the right.
Step 6. Select Data feed to upload Catalog csv file

Note: Only .csv file formats can be uploaded into the data feed, you may download a sample file here. Please make sure to include origin_country column in you file, you may refer the ISO code from here.
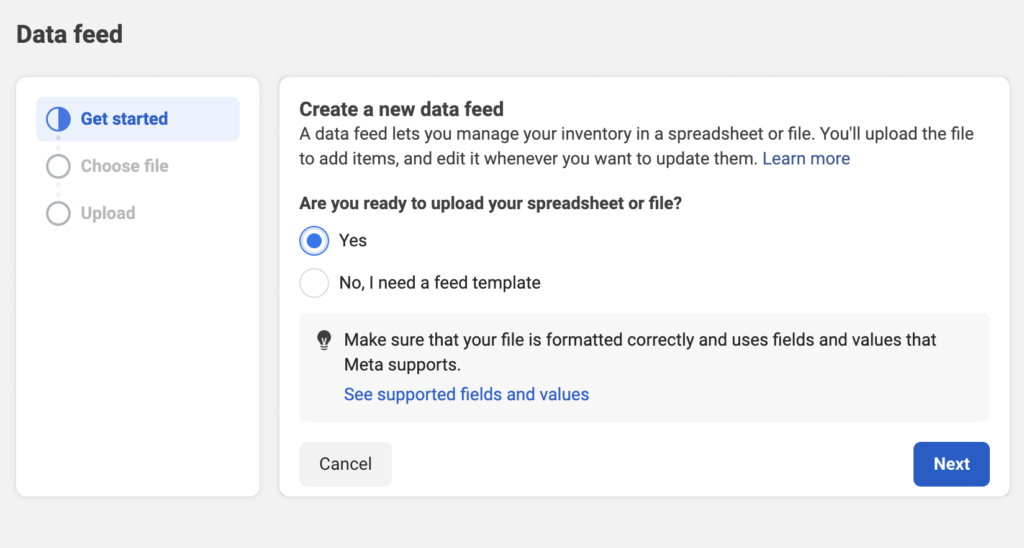
Step 7. Select Yes if your catalog file ready, else you may download the sample sheet from the option
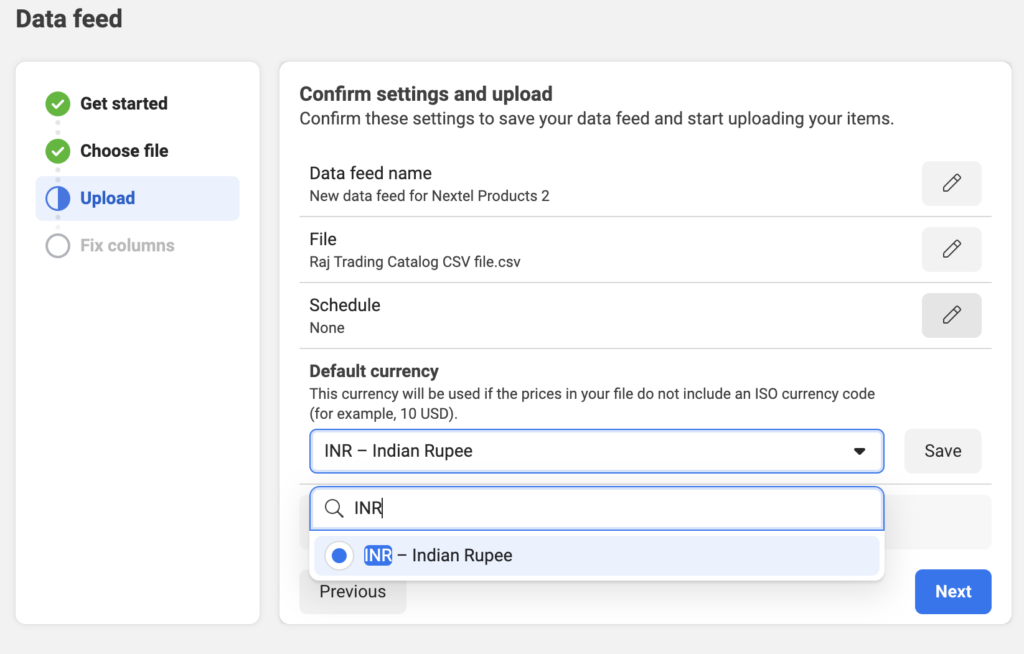
Step 8. After uploading the csv file, Select the Default Currency from the dropdown. Here in example we have chosen INR.
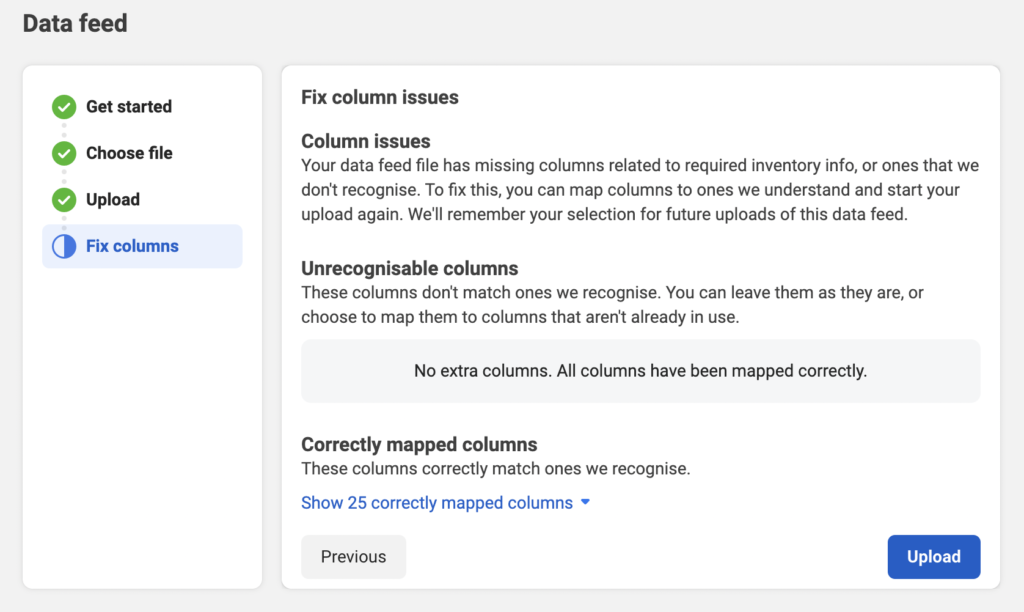
Step 9. You may check if all the columns were correctly mapped in the catalog
Once uploaded, you will redirected to a screen with of final upload that will display warnings or errors. It’s okay to have 2 or 3 warnings related to Google product id, so it can be ignored.
Connecting your Catalog with WhatsApp API number
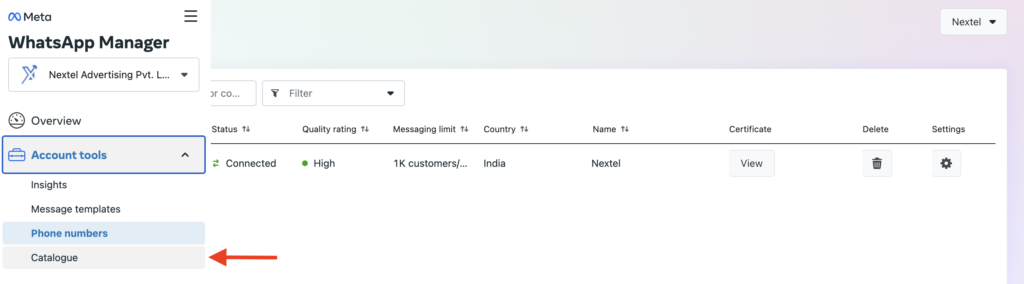
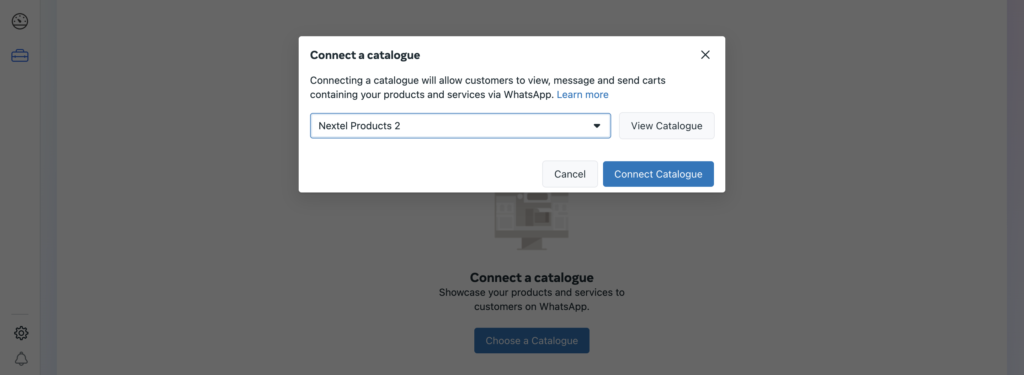
Step 1. You need to visit you WhatsApp Manager to connect your Facebook Catalog. From the left tab menu, select Catalogue
Step 2. From the page, click on Choose a Catalog. This will open a popup window, from the drop down options you can choose your created catalog and click on Connect Catalogue button.
Adding your catalog in Nextel dashboard
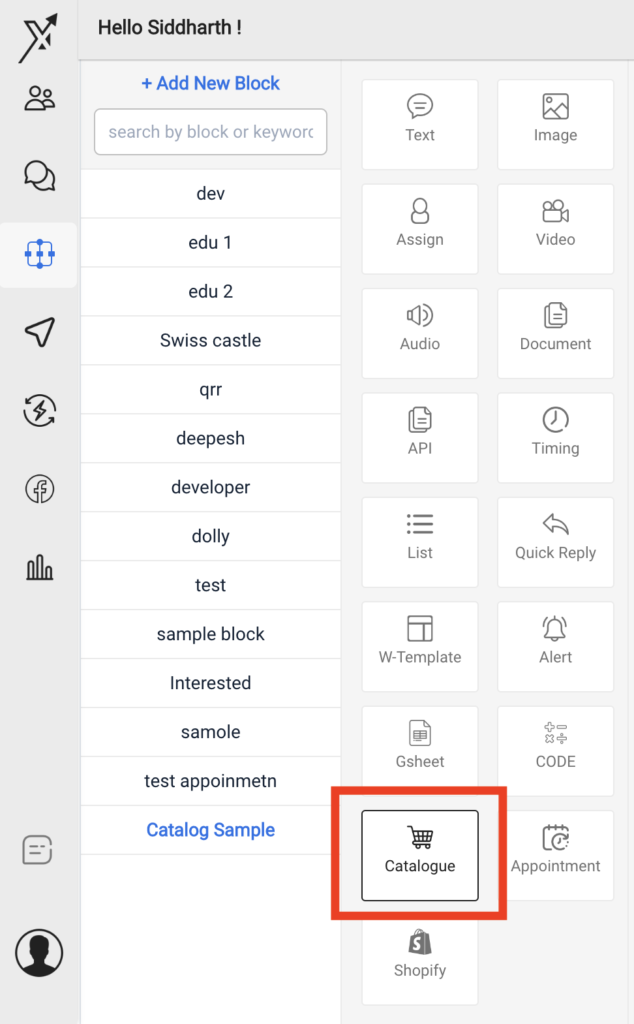
Step 1. In Nextel Chatflow, click on Catalog element (as shown below). If the element is not visible on you dashboard, please connect your support representative.
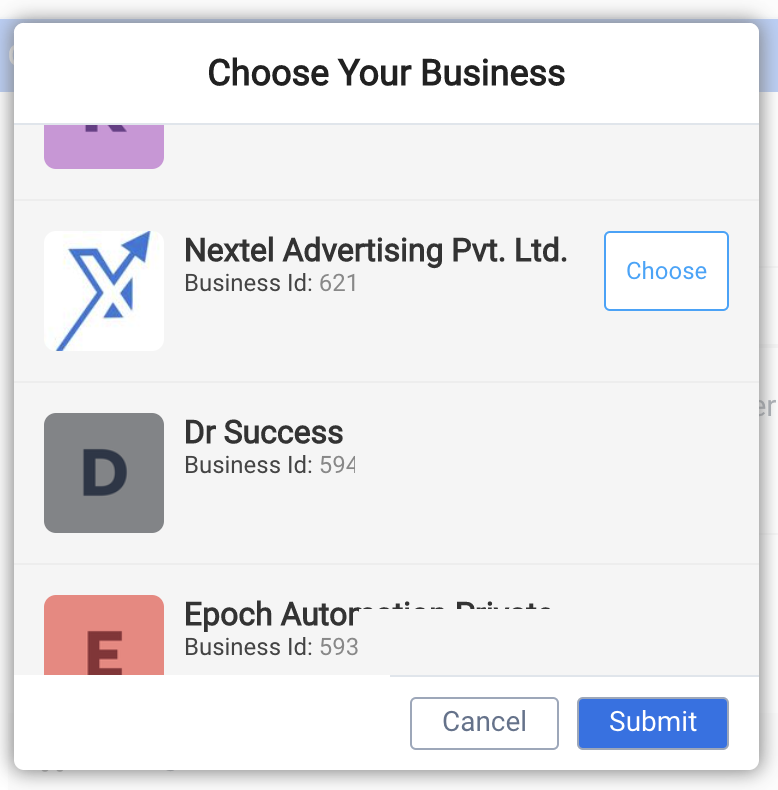
Step 2. This will open a pop-up window, Facebook will ask you to login and give Nextel permission to read you Business Manager and Catalogs. Once you have allowed permissions, please select the Business Manager and the Catalog you created in the following steps:
Once connected you will see a popup window asking to connect Catalog with WhatsApp API number, already performed in above.
Points to remember
- You can select maximum of 30 items from Catalog when you choose multiple products in Chatflow
- Column origin_country is mandatory for business selling products in India
- To direct customers to your catalog, you can send them a message with a link to your catalog (generated by following the format: https://wa.me/c/<biz_phone_number>).