Build a Chatflow
Chat flow is a sequence of automated replies that are created based on anticipated user messages.
By creating chat flows, you can walk the customer through your business services and products. It is a way of indulging in a conversation with your customer and increasing engagement in a structured manner. All without any manual involvement.
A chat flow is best put into use when the business clearly defines the goals a particular chat flow needs to accomplish.
To make a chat flow, you start by predicting how users might respond. Then, you create replies using templates, images, videos, audio, text, or lists. Users can then choose from different options for their next response. Depending on what they choose, you send the appropriate block of the chat for further interaction. The aim is for the chat flow to achieve its goal, whether it’s helping a customer, describing a product, or enabling direct contact. Knowing what customers say makes it easier to prepare a response.
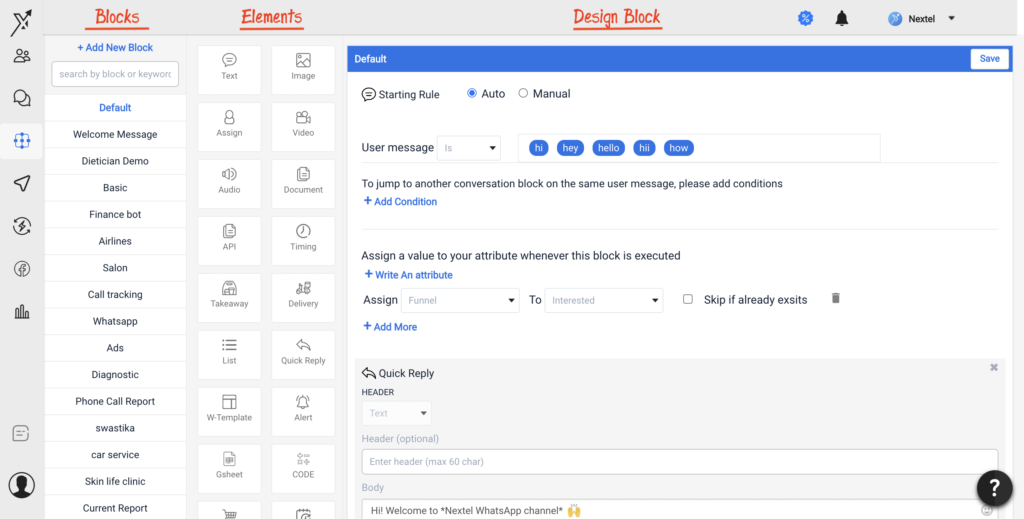
Components of a Chatflow
Chatflow can be found on the left hand menu of your Nextel Dashboard.
It is divided into 3 major parts:
- Blocks : A Block can be defined as one complete flow of message exchange between the user and the bot. This flow is continued until it is either bifurcated or concluded. You can add upto 20 blocks in Nurture plan and 50 blocks in Growth plan
- Elements : Elements can be defined as actions you want to perform during execution of the block. You can choose if you want to send texts, media, interactive messages, assign chats to your teammates, integrate API, send yourself an alert and more.
- The third section is your design block, this is where you curate your chatflow.
The first time you visit the Chatflow page, you will find blocks: Welcome and Failure already created. The Failure block is a system be-default block that gets executed when the Bot cannot understand the user input message. There is no need to add any user keywords in the failure block.
Elements
These are the elements you can use in your chatflow:
| Text : can be used to send text messages to the user like – “Hi {{first_name}}! How can I help you today?” | |
| Image / Video / Audio / Document : can be used to send media files. Note: You cannot upload media file larger 5 MB in size. | |
| Assign : With this element you can assign leads to your team members. | |
| API : can be used to fetch user information and messages into third party software, more details here | |
| Timing : You can manage your business timings through this element and also set messages for when your business is offline. | |
| Address : can be used to ask the user for their address. | |
| Gsheet : This element is used to integrate your chatflow to Google sheets. With this, all the information provided by the user will then automatically be stored in your Google Sheet. More details here | |
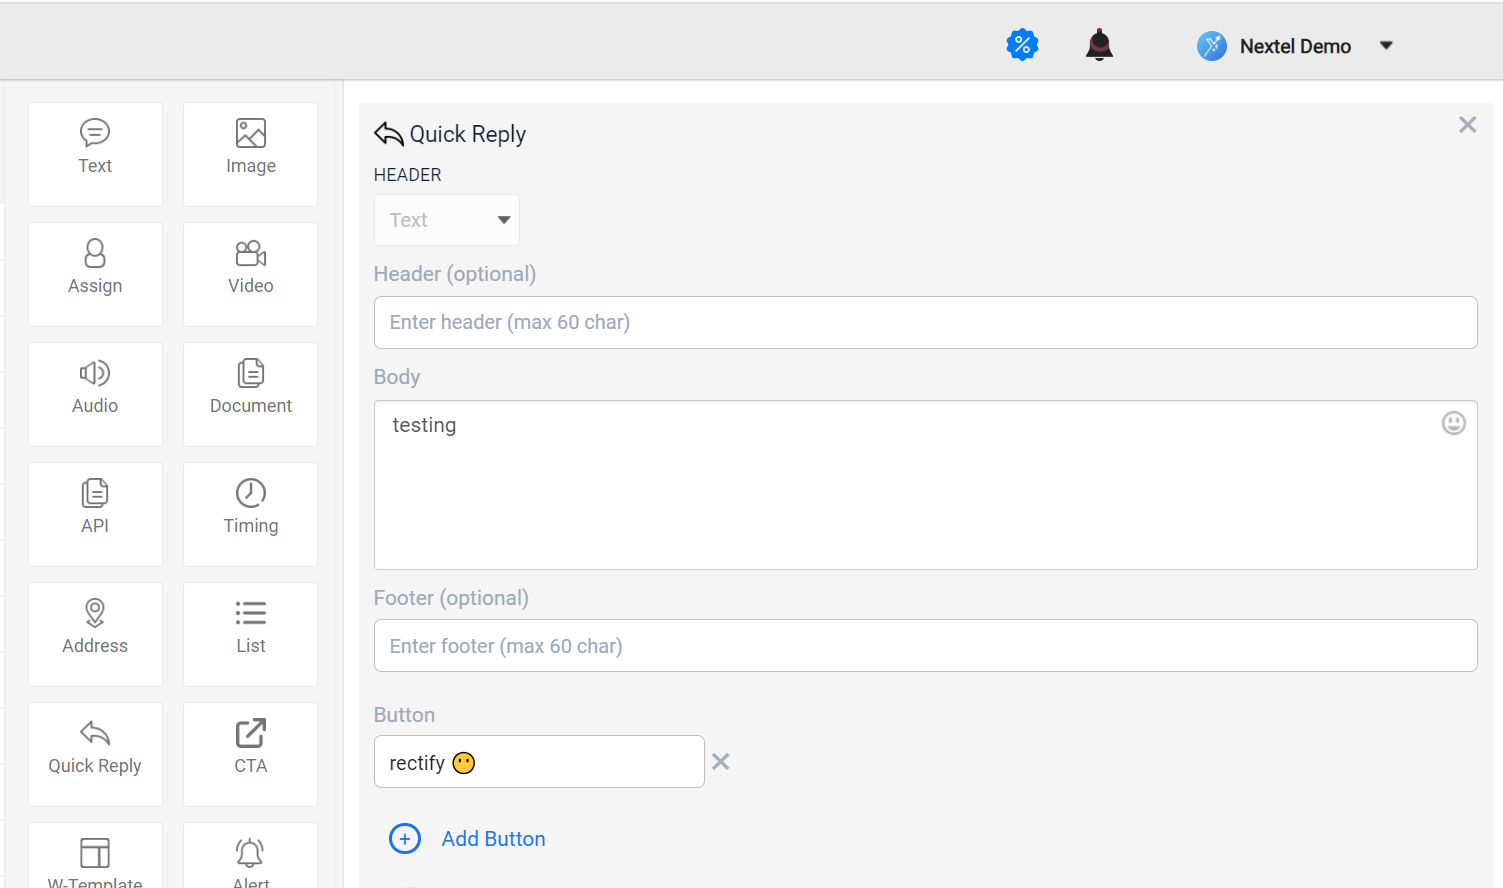
| Quick Reply : To send Text & Media with options for the user to select, in the form of buttons. You can add upto 3 button options for a user to select. | |
| List : List can be used if you want to send more than 3 options to the user. List allows you to send upto 10 button options. However, unlike Quick reply you cannot send media headers in the list. | |
| Wtemplate : You can send any of your approved template messages to the user in the chatflow using Wtemplate. This will be helpful in cases where you want to send CTA interactive messages to your users. | |
| Alert : You can send yourself or any of your team members a real-time alert on WhatsApp number, when any flow is executed. You can choose the phone number to whom you want to send this alert to and the template message that you want to send. You need to add the phone number in App Settings > Install > Call Tracking to see the number in the drop down list. | |
| Code : You can perform simple arithmetic operations like Addition, Substraction, Multiplication and Division based on user inputs, for instance, if you want to calculate user BMI through WhatsApp. | |
| Catalog : Through the Catalog module you can sync your facebook product with Nextel and send a product or a list of products to the user when the block is executed. You may find all the steps to connect and send catalog items on Catalog Ordering article | |
| Appointment : Appointment module allows to take user appointments on WhatsApp. You can create a calendar for your service with operational time and appointment duration, share the link with the user to book your service. | |
| WooCommerce : By incorporating this feature, you can directly connect Nextel to your WooCommerce store, enabling functionalities such as order cancellation, order creation, order status updates, feedback publication, phone-based status checks, and sending checkout links. Integrating this element into your workflow ensures that all customer updates are automatically transmitted to WooCommerce through API integration. | |
| Shopify: This feature enables you to seamlessly connect Nextel with your Shopify store, offering functionalities such as order cancellation, order creation, order status updates, feedback publication, phone-based status checks, and sending checkout links. Integrating this element into your workflow ensures that all customer activities are automatically synchronized with Shopify, updating their website through API integration. | |
| Payments : You can utilize the payment element to collect payments from customers through WhatsApp. Payment sources can include orders, attribute values, or fixed amounts such as Rs. 5000 for a gold membership. | |
| Forms : You can use this element to attach your published Whatsap forms to your chatflow. | |
| Zoho : You can use this element to collect user data to your Zoho CRM automatically. | |
| Ask Location : used to ask the location of the user. |
Steps to create a simple Chatflow
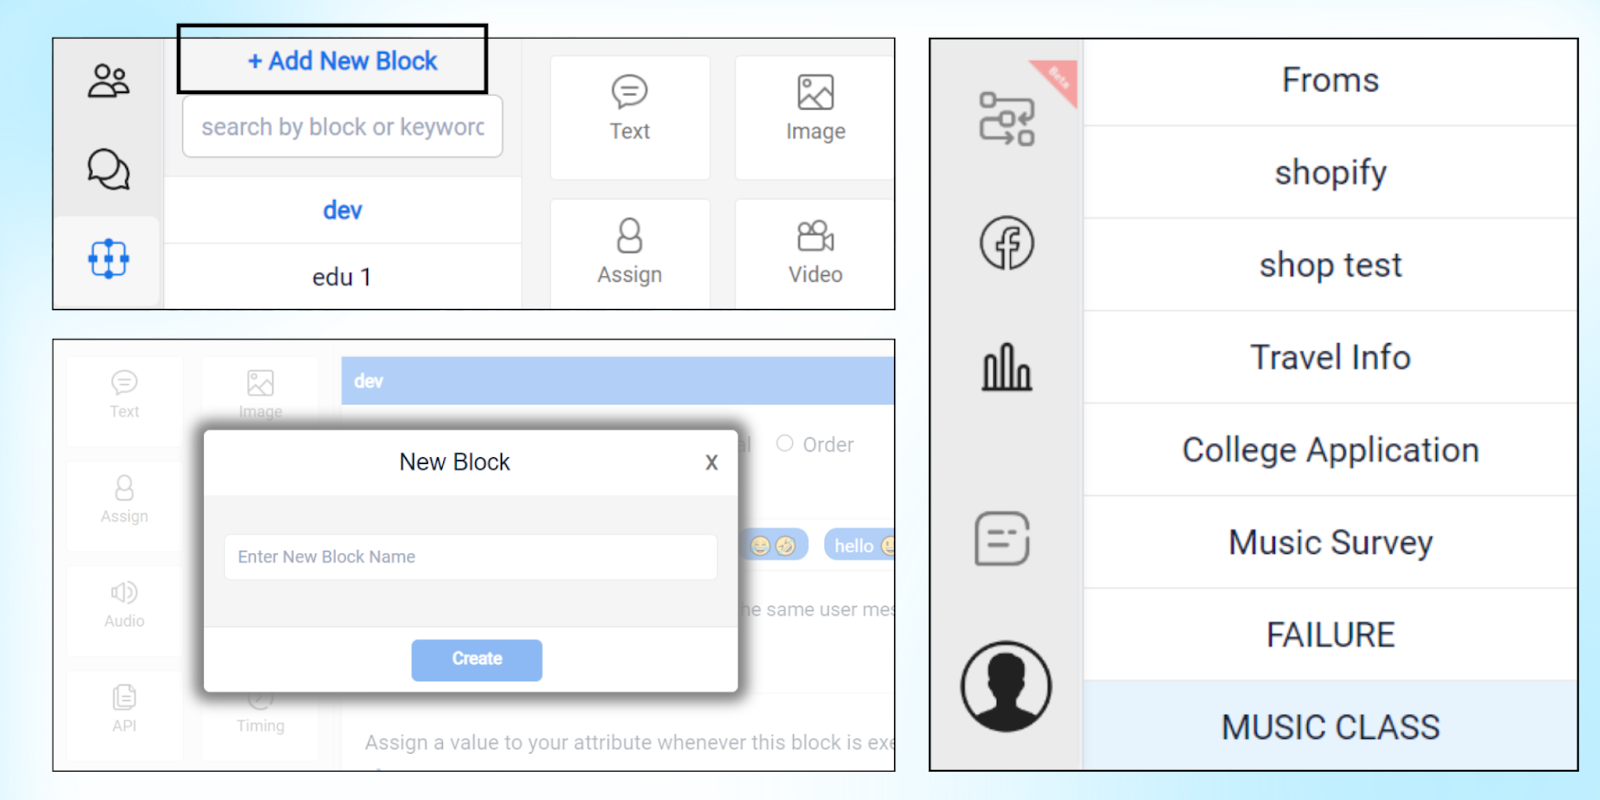
Step 1. Click on Add New Block to create a block. This will open a popup window to enter the block name. The new block will be created and will appear in the bottom of the block list.
Step 2. Add keywords on which you want to execute the Chatflow, you can add upto 10 keywords in a single block.
Note: You cannot have the same keyword in 2 or more blocks, if you try to add a keyword that is already added, the dashboard will throw an alert message.
Step 3. Add the elements action i.e. text, media, API, etc, that would like to perform. To send series of messages, you can place element one after another in the Block
Designing Blocks
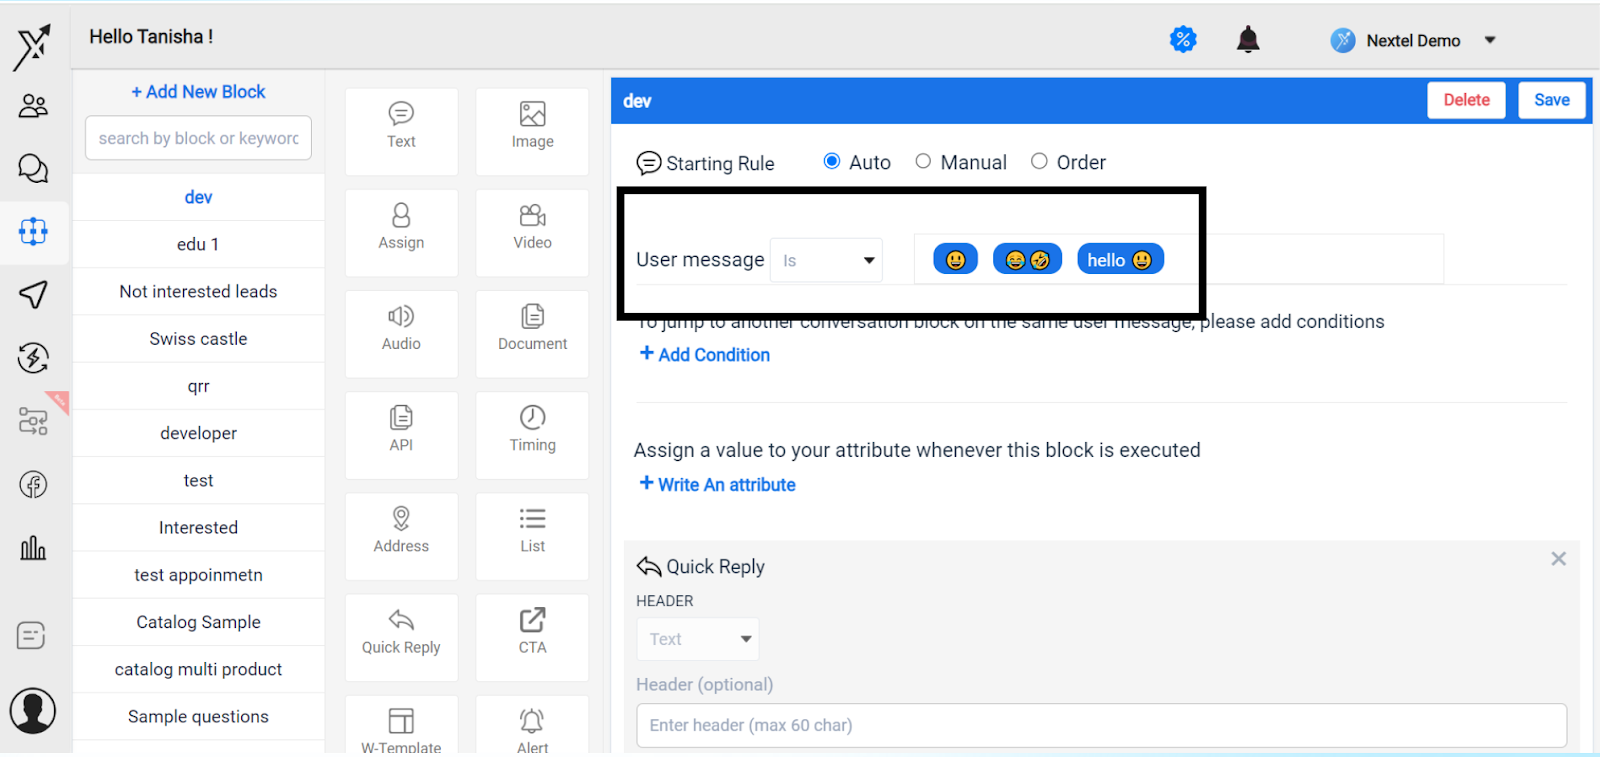
User Message (keywords)
The first thing you need to enter while designing your chatflow will be the keyword on which the Block will be executed. You can add words, phrases or sentences in English or in any other languages inside the text box. To add keywords you need to type the word and tap enter and then Save the block.
You can set two conditions for keywords.
- Is – In this condition, the flow will only be triggered only if the user’s message is the same as the keyword set.
- Contains – In this condition, if a user’s message contains the keyword anywhere in the message, the flow will be triggered.
More details on Keywords matching and working here
Block Conditions (Optional)
Next, you will find an option to Add Conditions to execute the block, these conditions allow to run different flows on user attributes, on the same user keyword.
Let’s suppose you run a Health Club and have customer data with their membership type (Platinum, Gold and Silver), now you want to send different messages to your user based on their membership type then you can create 2 more blocks for other membership types.
Write an Attribute (Optional)
The functionality allows you save a value in attributes for the user for whom the chatflow is triggered. For example, you want to change the Funnel attribute value to Prospect when a user clicks Interested on your marketing campaign message, then you can do it using Write an attribute.
You can choose to write values in multiple attributes.
Add User Input
This allows your chatbot to wait for user response before executing the rest of the Chatflow in the Block. This allows the bot to process the user provided information for further execution. There are series of operation that you may perform with user input message, like:
- Save the response in an attribute like the user name, address, city, etc.
- Validate the input data, if the user has provided the info that we asked. For e.g. Image, Email, Location, etc.
- Trigger / Jump to a different block based on user response, this allows you to bifurcate your Chatflow based on user message.
Below is an example on how you can create a Chatflow asking for customer name, email, validating email and then bifurcating the Chatflow based on user marital status.