Sequence Explained
Sequence allows you to build cohesive campaigns for automated messaging and user interaction through the Whatsapp channel. This flexibility, combined with subtlety of targeting customers based on their data makes up for an ultimate contextual messaging experience.
The complexities of the most dynamic messaging journeys are made simpler with Nextel’s visual binder.
What is Sequence?
Sequence is made up of “blocks” that are connected in a path.
There are four kinds of block:
| A Rule Block is where you define the filters that a customer must meet to enter a sequence, or proceed down a specific path.You can filter based on customer/company data attributes, or interactions with previous parts of a sequence. | |
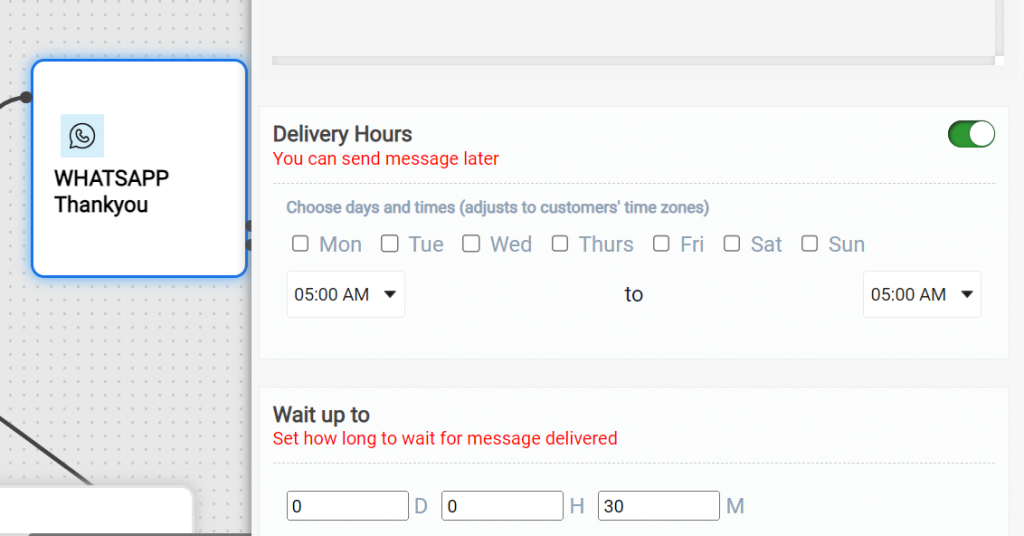
| A Whatsapp Block is where you choose the pre-approved template for the message that the customer should receive upon entering a sequence.Whatsapp blocks can have specific scheduling wherein the delivery hours and wait upto time can be set conveniently. | |
| A wait block lets you define a specific time period, or date that must pass before customers will proceed any further through a sequence. You can either set the period of time to wait or a specific date. | |
| A Tag Block lets you automatically apply tags to customers as they complete their journey through a sequence. You can tag customers when they match the filters for a rule block, or based on interactions with series content. |
Blocks are connected in paths.
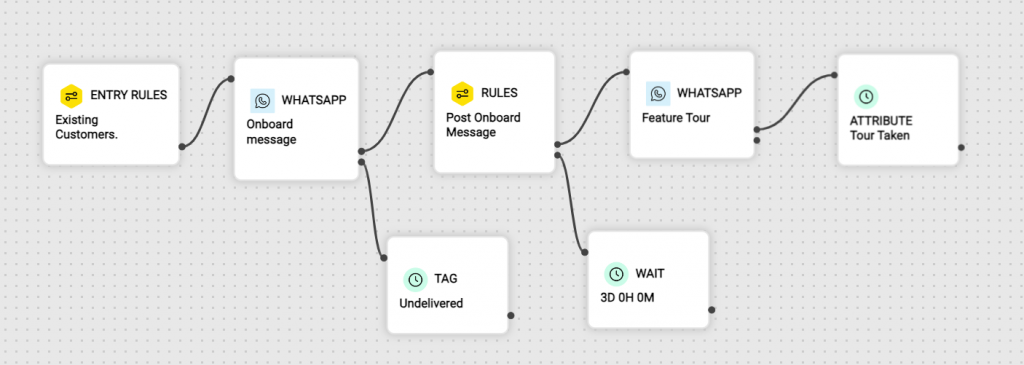
You can create a simple linear path like: Entry rule for Existing customers – Onboard message – Post onboard messages – Features Tour.

Or create a sequence with diverge and converge paths, based on delivery status of the WhatsApp message.
How to build a Sequence
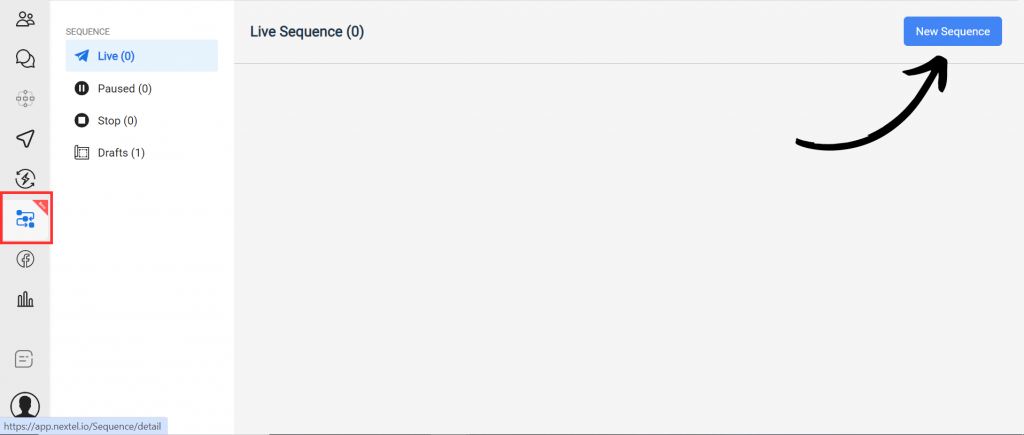
First, go to https://app.nextel.io/dashboard > https://app.nextel.io/Sequence and from the main menu click on New Sequence from the top-right corner.
The first step to take is adding the entry rules. This is the set of filters a customer must match to enter the series and start receiving messages. A rule block is added by default as you create a new sequence. If you wish to add more, you can drag and drop it from the sidebar on the right.
Then click on the rule block to open its settings. Here you can add rules and filters that a customer must match to enter the Sequence.
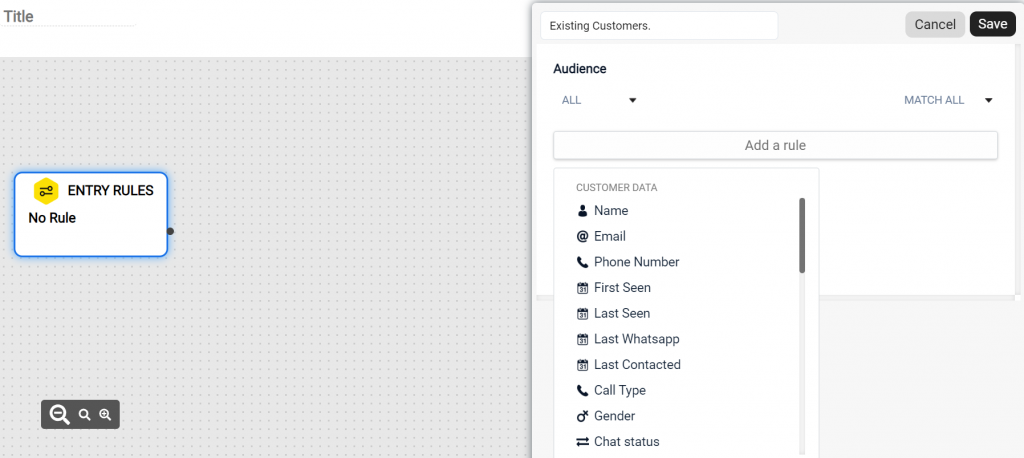
Note: If you’d like certain types of customers to enter the same Sequence at different paths, just create multiple rule blocks.
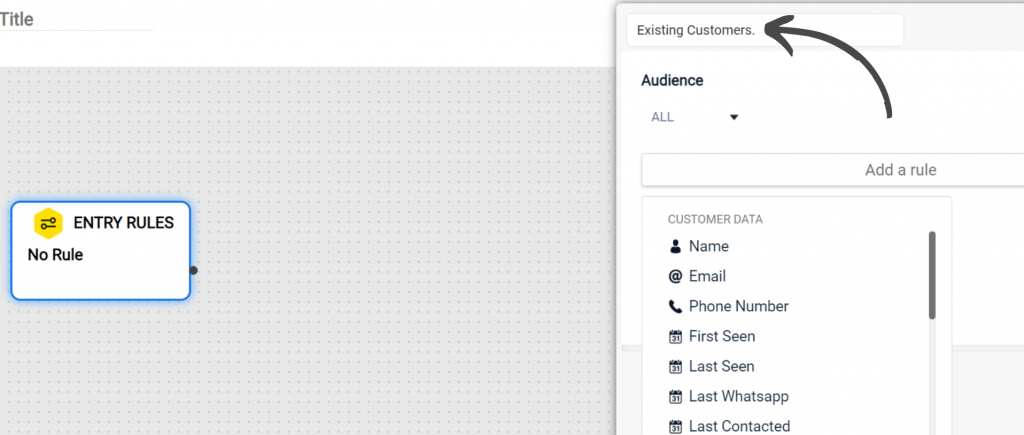
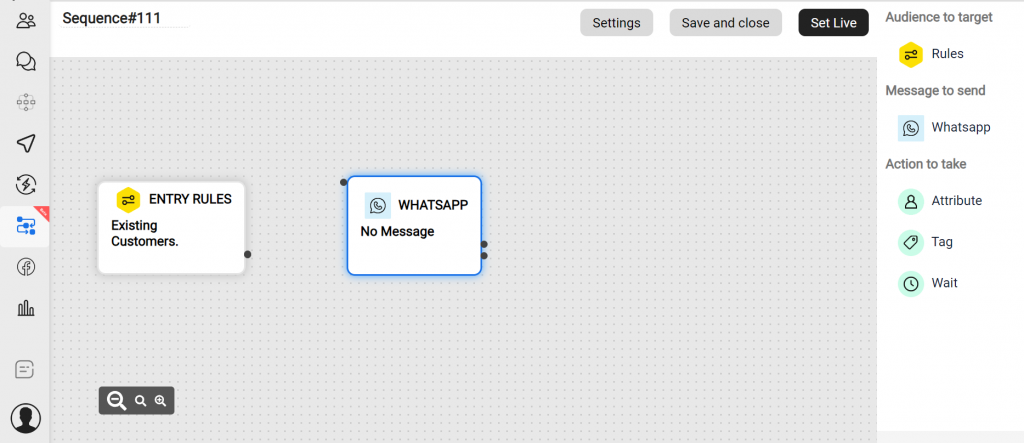
As you add blocks, it’s a good idea to give them a clear title, which will be visible in the Sequence overview, so you can see at a glance what’s going on like Existing Customersfor Entry Rules:
Next, let’s add the Whatsapp block to create a message that will be sent when a customer matches the filters of the Entry rules.. You can drag and drop a message block from the right hand menu.
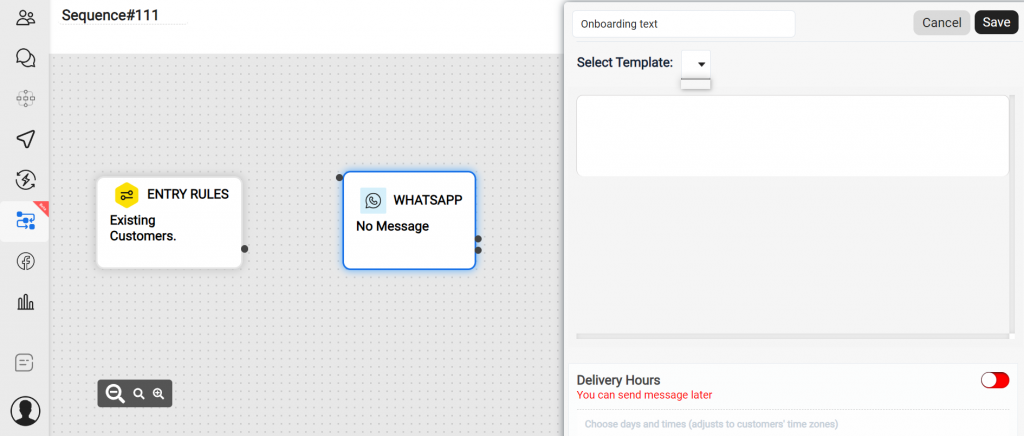
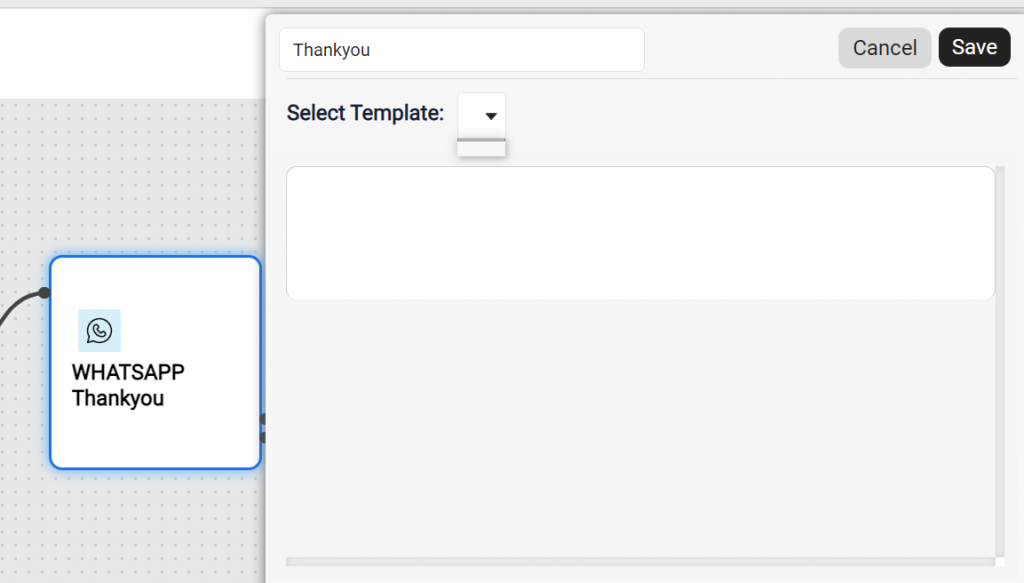
Then, open the message, give it a title and select from the pre-approved templates available.
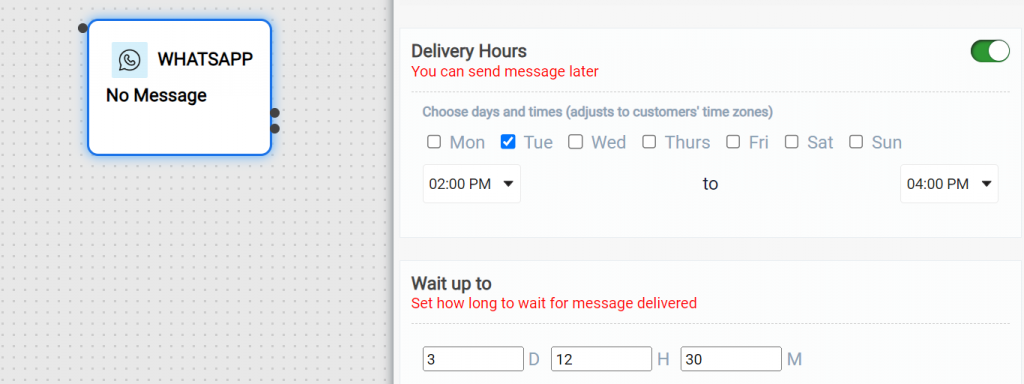
You can Schedule the delivery hours and waiting time of your messages according to your convenience.
The Whatsapp Block has to connecting points. One is for the delivered message and other is for the undelivered messages. You can add new blocks for the delivered messages and for the undelivered ones you create another another path to resend the messages.
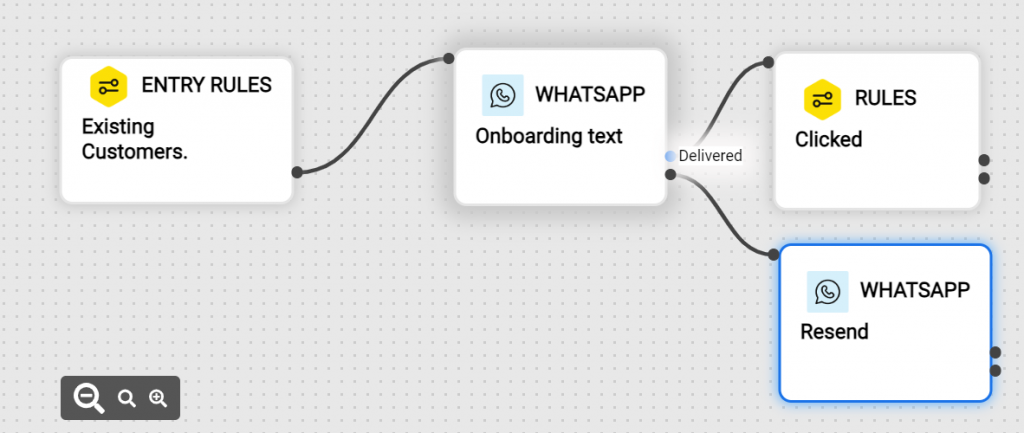
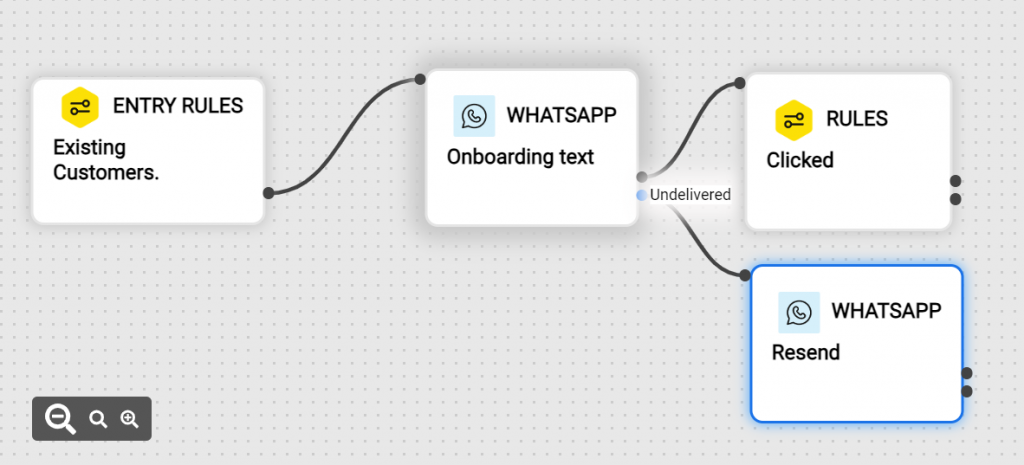
For all the users who do receive the message, you can add specific rules based on how they interacted with it. E.g. you could target everyone who clicks the upgrade link in the message. You can also set the waiting time duration before the message is delivered.
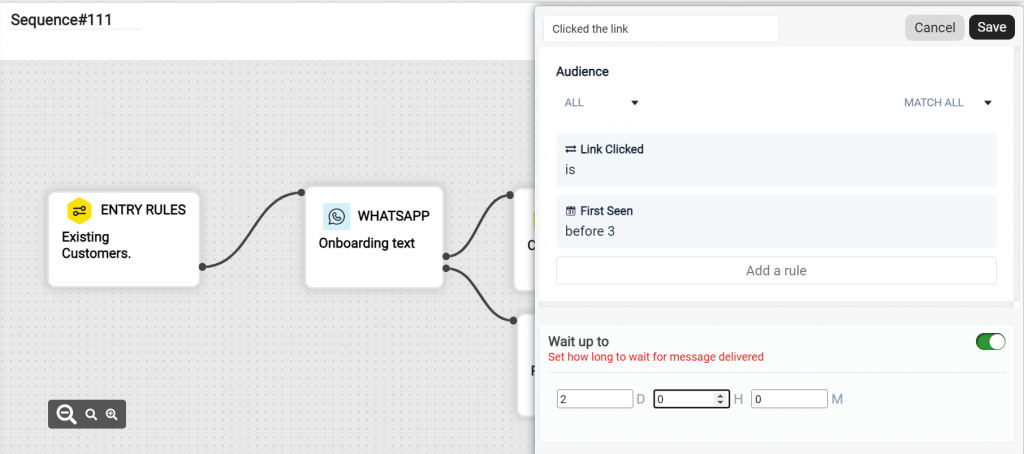
This allows you to direct users down separate paths based on whether or not they match the rule.
Now, For the once who match the rules for the Rule Block, Add Another Whatsapp Block offering them a feature tour.
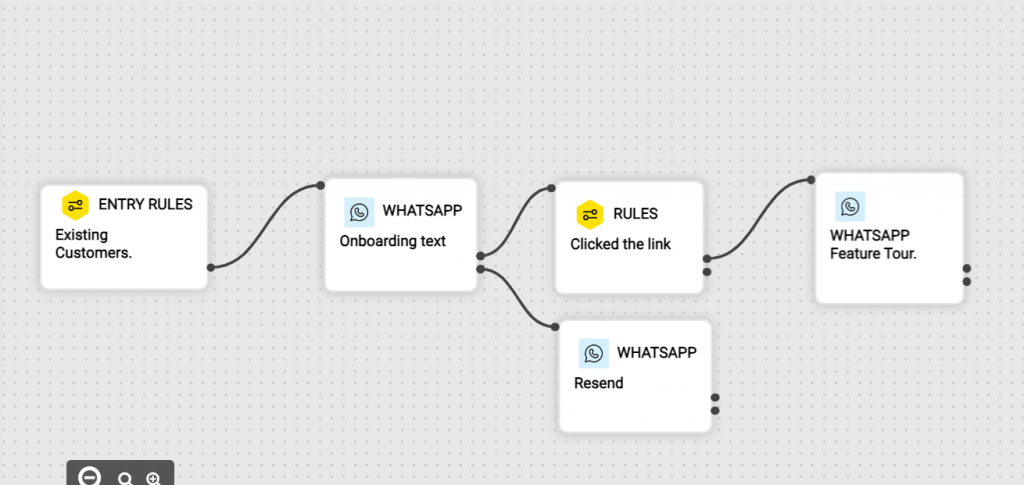
You can also add Wait Blocks, Tag Blocks and attach attributes to your Sequence. For Example, here in the case of resent messages we’ll add a wait block for the delivered category and a Tag Block for the undelivered categories before adding another Rule Block.
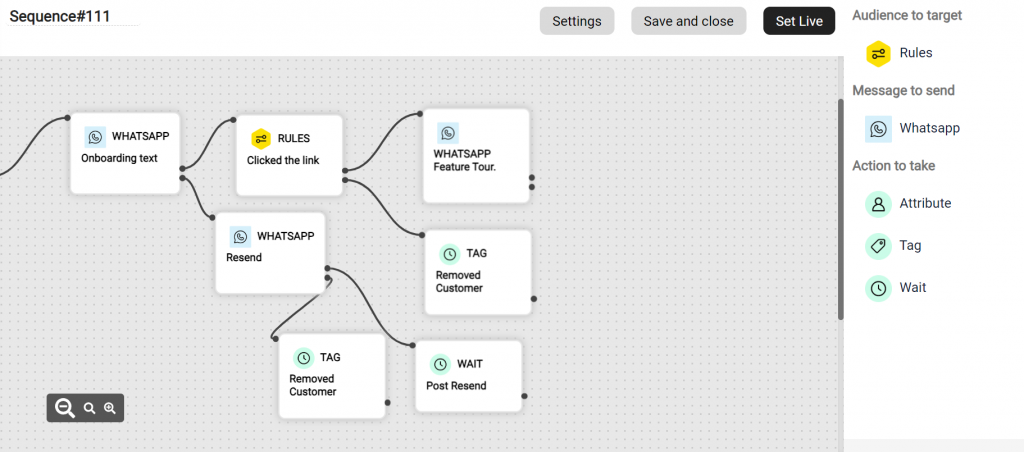
Add a Rule Block for Post Resend and Feature Tour messages accordingly and create your sequence this way. Let’s take a look of how a complete sequence might look like.
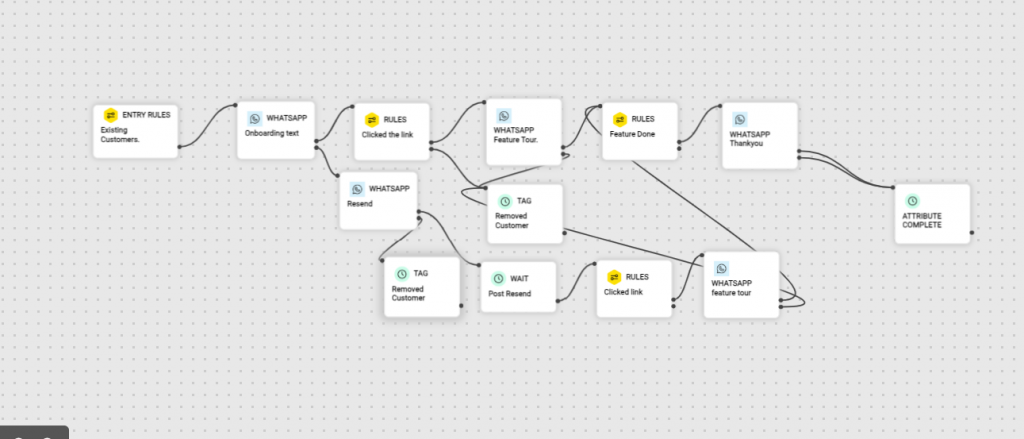
You can add blocks according to your need and requirements.
Using conditions in rule block
A Rule Block sets the conditions and rules that if matched by the audience triggers the sequence. There are various conditions available for the Rule Block and these conditions are to be matched by the customers for them to receive the next message.
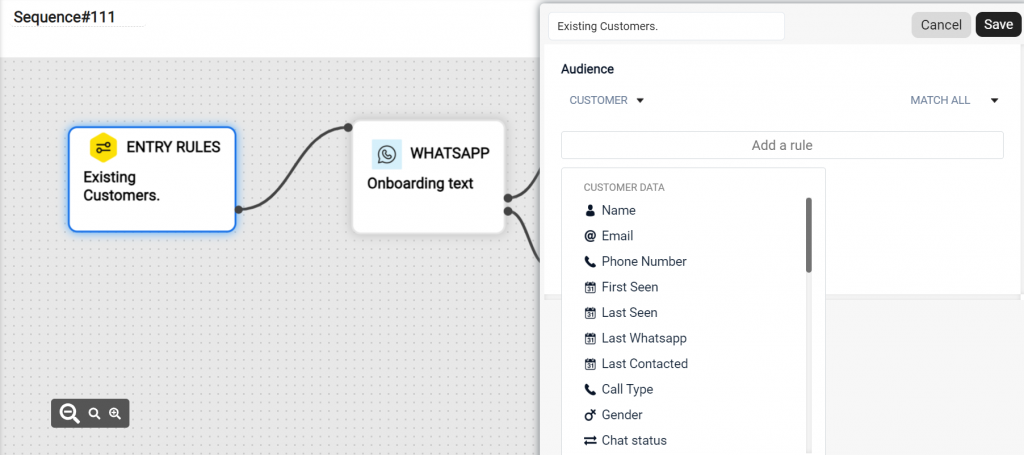
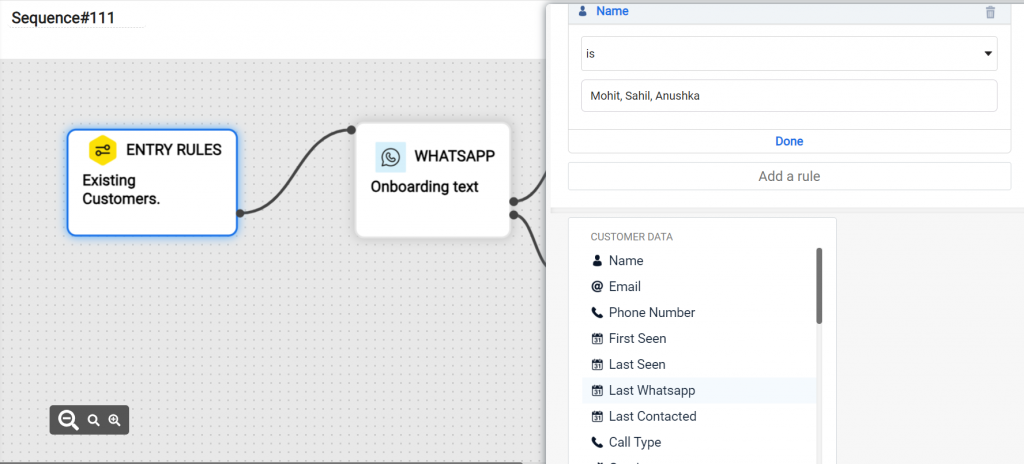
These are the conditions you can choose from for a Rule Block. For Example, if you chose Name as your rule and is the user’s name is Mohit, Sahil or Anushka then only they will receive the onboarding message through the Whatsapp Block.
Wait blocks
The “Wait’ block enables you to add spacing between 2 messages.
- Example: Send an email → Wait for 3 days → Send a follow up chat message
You can set two conditions to trigger the next message:
- “Wait until a period of time”
- “Wait until specific date”
Tag blocks
Teammates will be able to use the tag block to tag or untag (remove tags) any users in Sequence, based on the actions they take:
- Multiple tags are allowed in the tag block.
- You can create a new tag here and also can use any existing tag from the workspace.
Tag blocks can be used for example for:
- Automatically include/excluding users in other Sequence
- To update how customers are routed to your teams’ inboxes
- To flag to your team what messages customers have received / actions they’ve taken
- To remove tags from users based on what path they took in the Series
Attribute blocks
Attribute Block is used to attach any information received, customer data or responses to the attributes available.
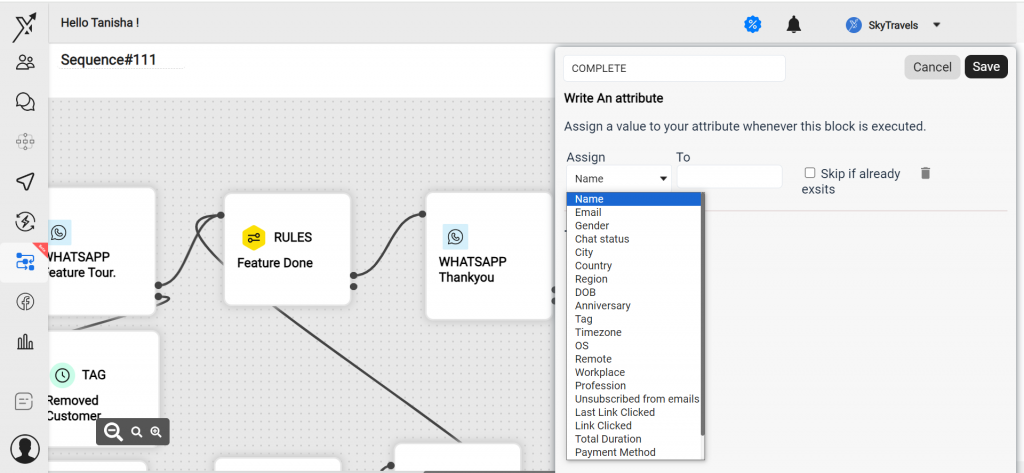
API blocks
API block in our case is the Whatsapp Block. When a user matches the rules of the Rule Block Whatsapp Block is used to curate messages that will be sent to the user. You have to choose from the pre-approved templates of whatsapp messages. You can also schedule the delivery hours and the wait time for these.
Setting goal and exit rule
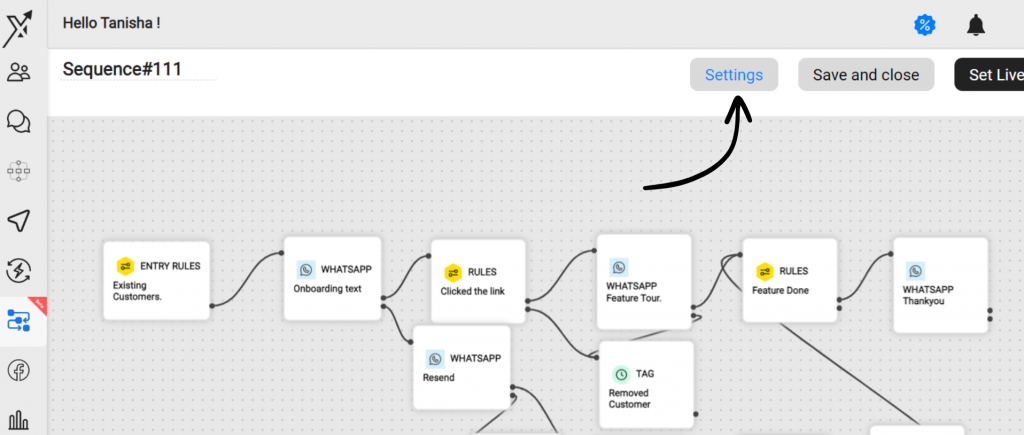
To properly gauge how effectively your Sequence is encouraging customer action, you should add a goal for anyone who enters. Do this under “Settings”:
Then choose the right filters and Save.
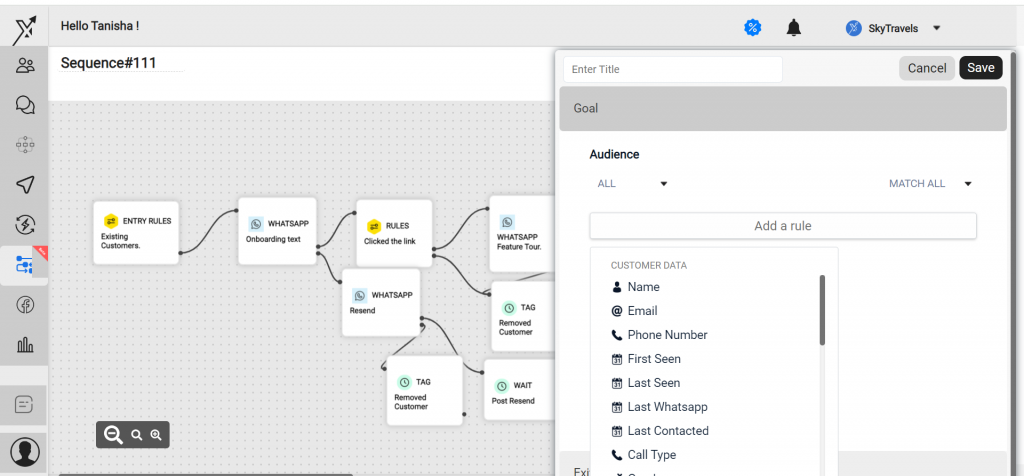
On the same tab you can define overall exit rules for your sequence:
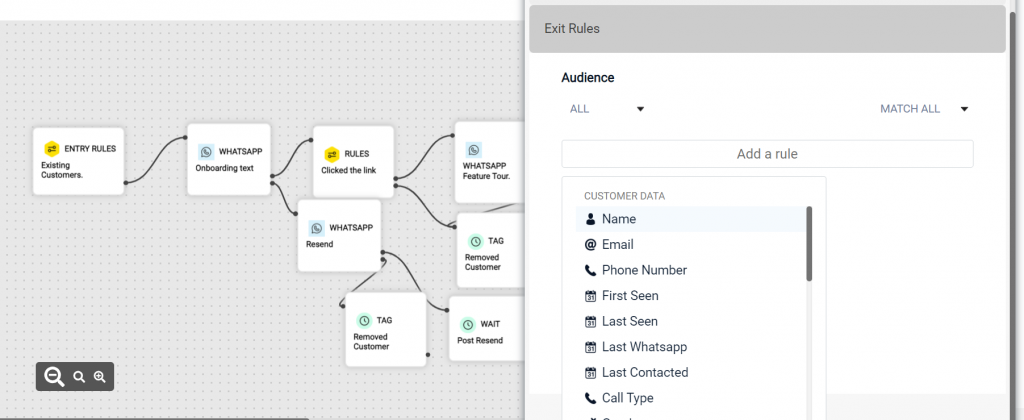
If a customer’s data is updated to match the filters in this rule they will exit the series completely, and cannot re-enter.
Customers can also exit a Sequence if they reach the end of a path, hit the series goal or don’t engage with messages for a set time.
Setting sequence live
Now that you have set your rules, added your tags and written your messages, it is now time to set your sequence live.
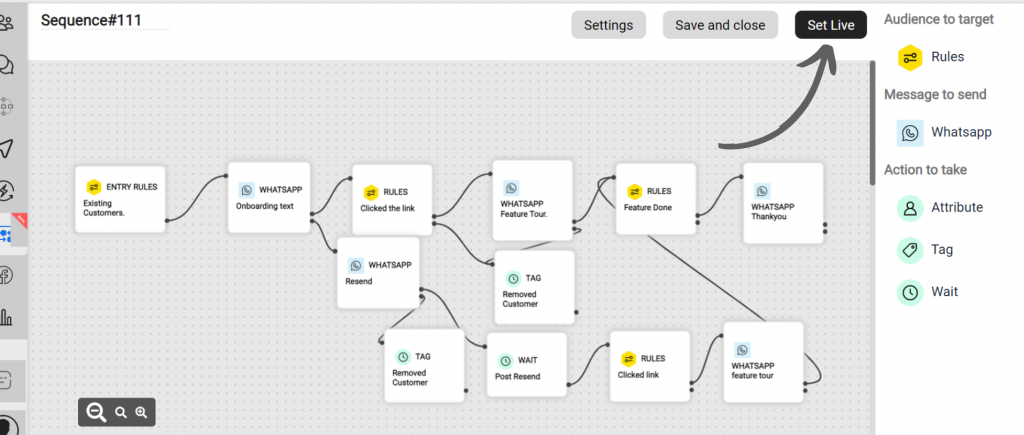
As soon as you set the Sequence live, customers will start to enter if they match your entry rules, and you can easily measure how they’re progressing.